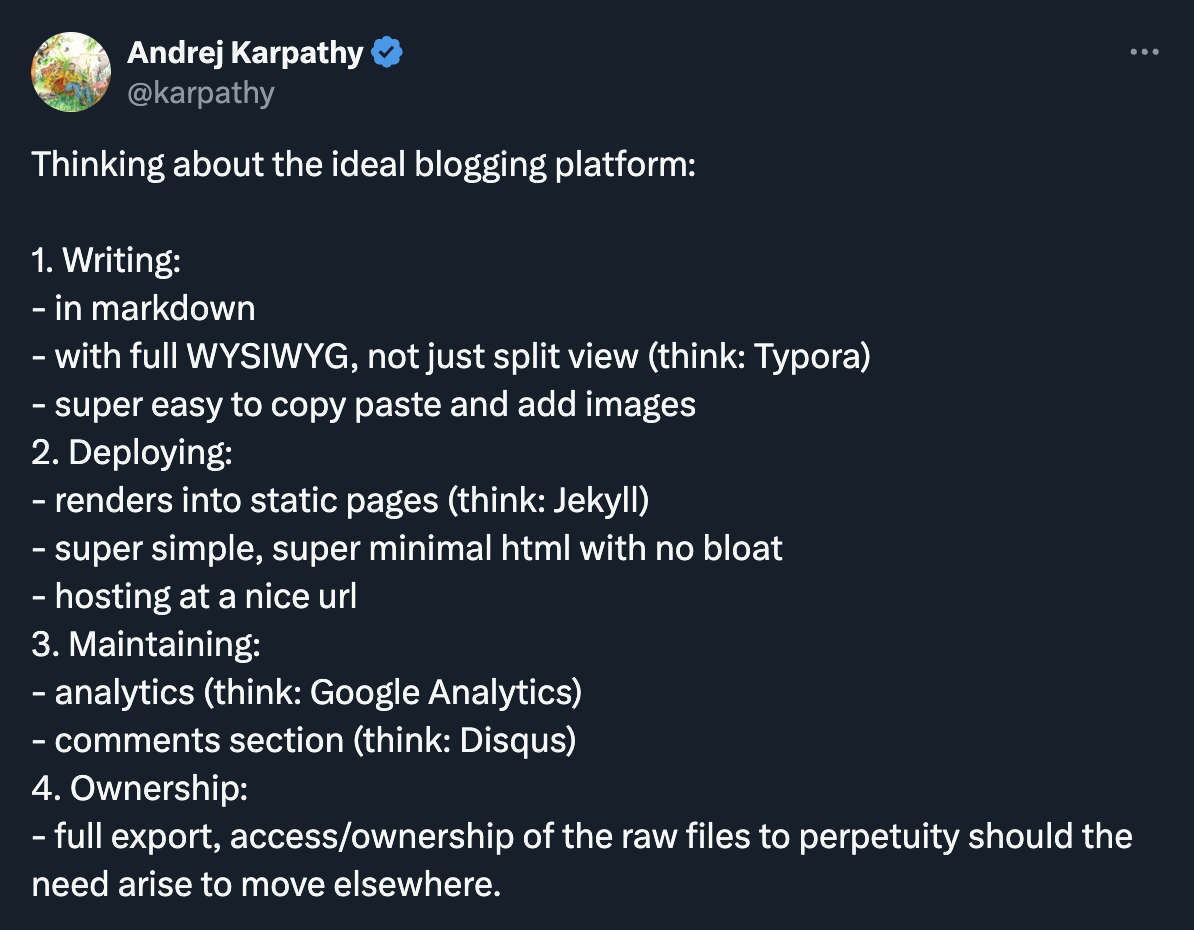
The other day I was looking for an easy way to build and publish my blog when I came across this post on X:

It summed up pretty well my requirements!
- Writing in WYSIWYG Markdown
- Publishing with 1 click/command
- Hosting: simple and reliable
- Customizability: easy to tweak layout and add more features such as comments
- Maintenance: analytics
- Full ownership of my content
- And of course everything should be free 😋
In the comments of the post, @kepano (the CEO of Obsidian) shared his blog setup, which met almost all of the points above. Although his blog uses Jekyll, he also mentioned Quartz, which seems to be a newer alternative. I decided to try Quartz, with Cloudflare for hosting and analytics. So here’s how to build such a blog, step by step.
0. Prerequisites
- Git
- Obsidian
- A Github account to store the remote repo of your blog
- A Cloudflare account to host your blog
1. Create a remote repo and get an authenticated URL
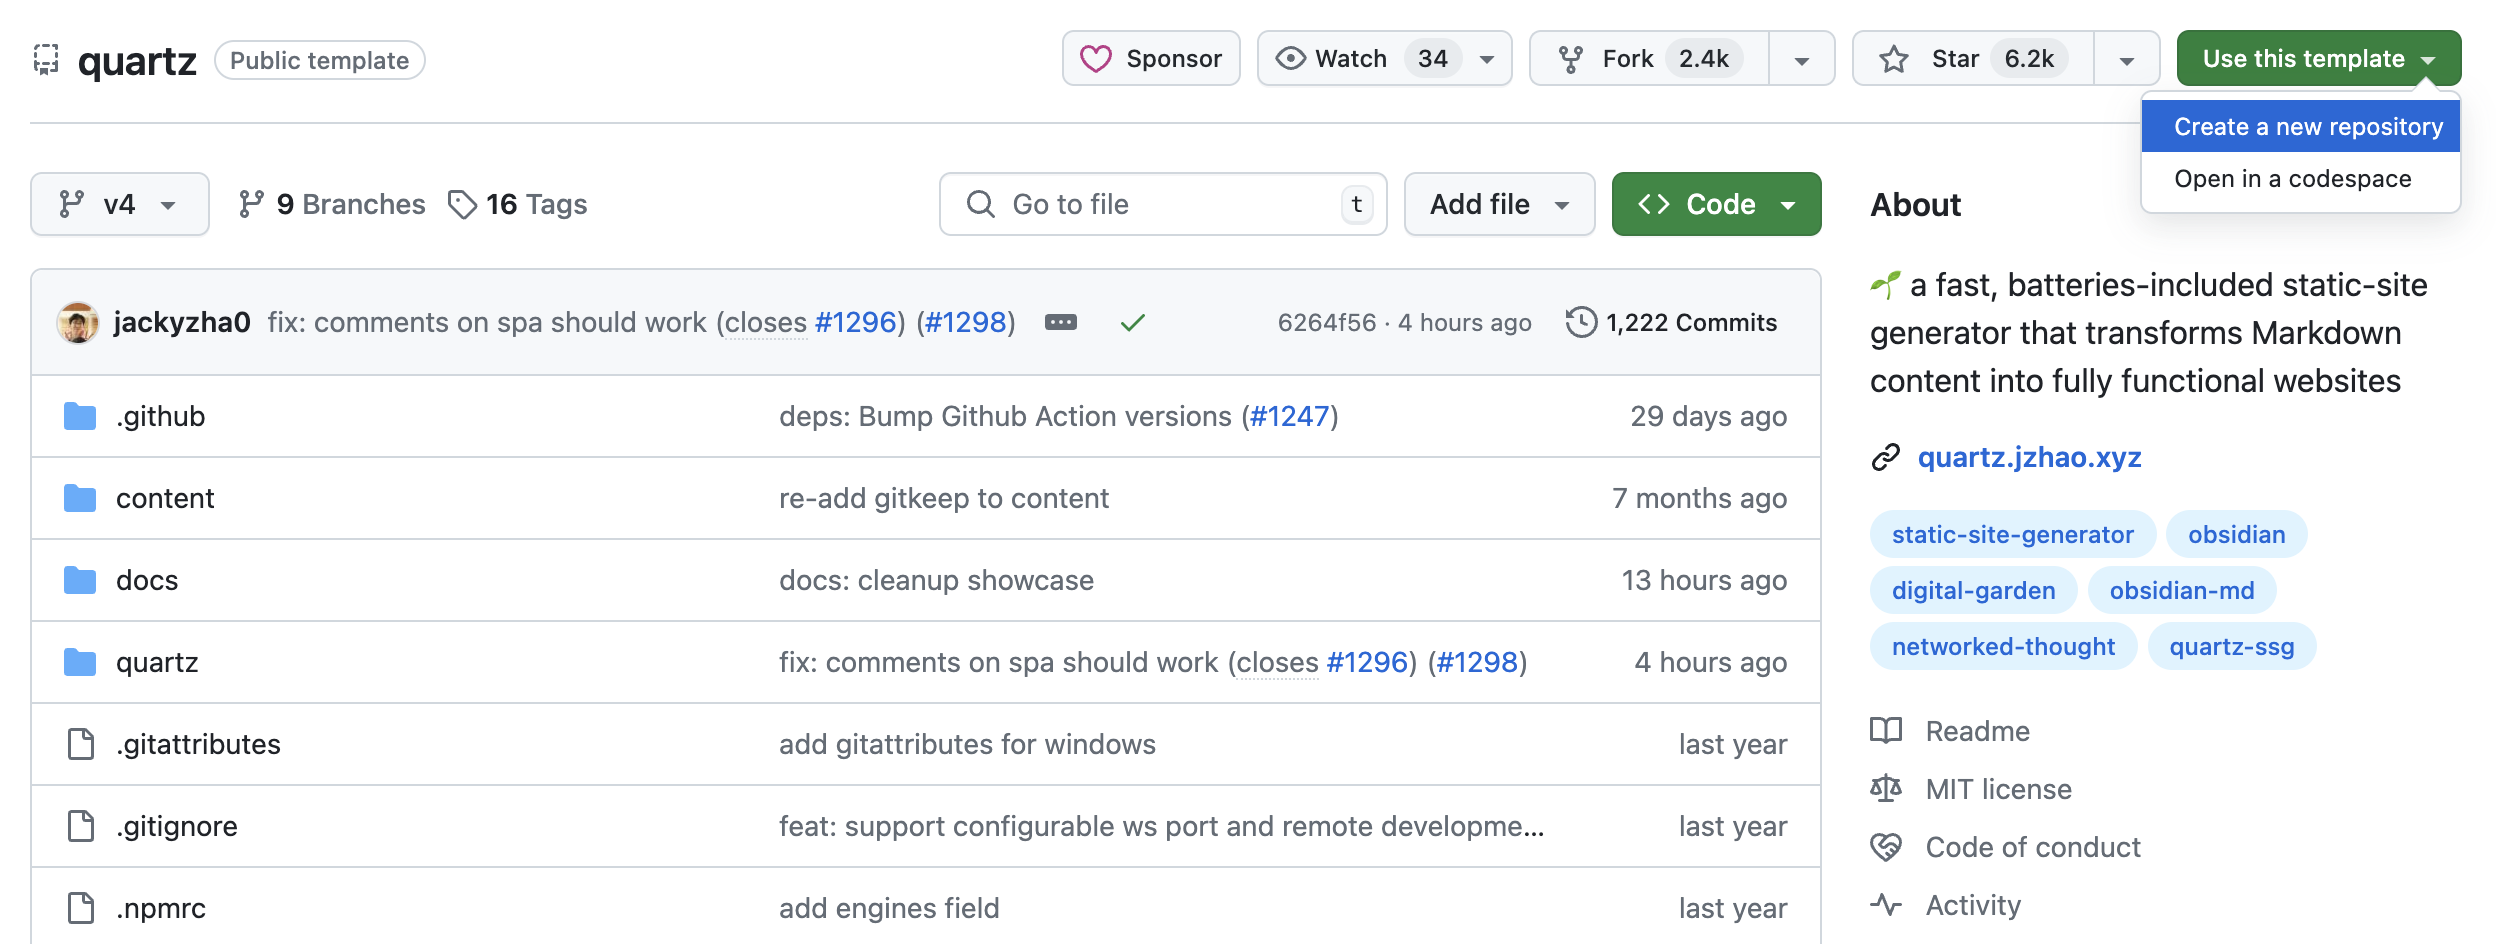
- Go to https://github.com/jackyzha0/quartz and click Fork at the top
 change
 quartzto your blog name, then choose Create fork - After creating a fork, you need a token to access it from Obsidian
- Go to your Github > Settings > Developer settings > Personal access tokens > Tokens (classic)
- Click Generate new token > Generate new token (classic)
- Set scopes to
repo& expiration toNo expiration - Click Generate token
- Copy the token, which is in the format
ghp_XXXXXXXXXXXXand store it somewhere safe
- Get the authenticated URL to the repo
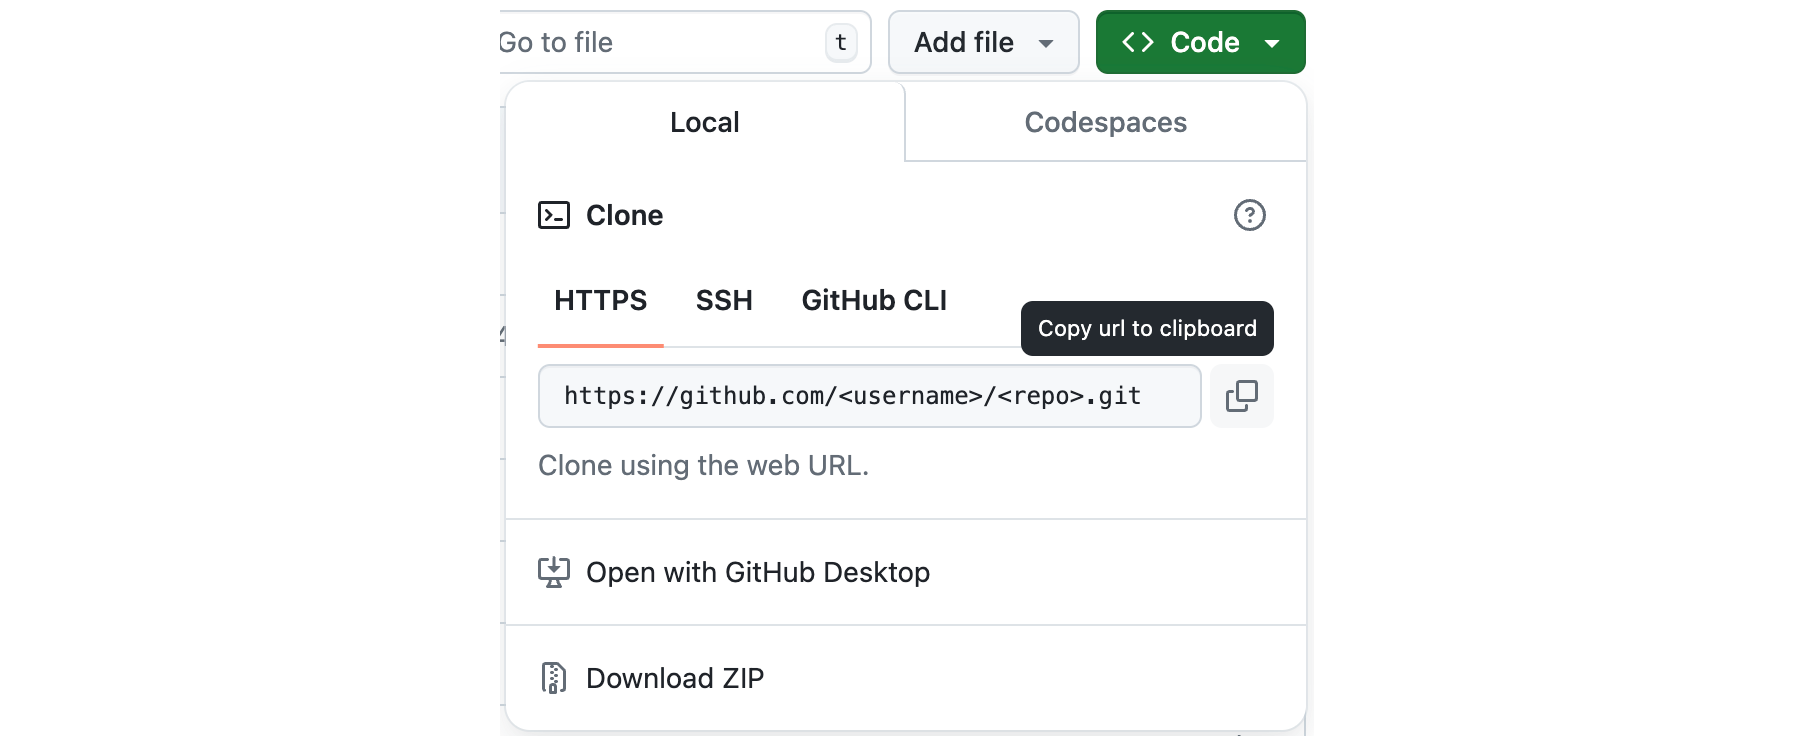
- Go back to your remote repo, click Code and copy the HTTPS URL on the Local tab, e.g.
https://github.com/<username>/<repo>.git
- Modify the URL by adding the token generated in step 2 so that it looks like this:
https://ghp_XXXXXXXXXXXX@github.com/<username>/<repo>.git
- Go back to your remote repo, click Code and copy the HTTPS URL on the Local tab, e.g.
2. Set up your Obsidian vault
- (Optional) Create a vault for blogging, e.g.
blogging - Install and configure the Obsidian Git plugin
- Create a folder to store your blog repo, e.g.
blog/ - Bring up the Command pallet with Ctrl + P (or Cmd + P on macOS) and run the command Git: Clone an existing remote repo
- Paste in the URL of the remote repo
- Type in the name of your blog folder you created in step 3, e.g.
blog - Leave the depth of clone empty and hit Enter/Return
- Reload Obsidian: Ctrl/Cmd + P > Reload app without saving
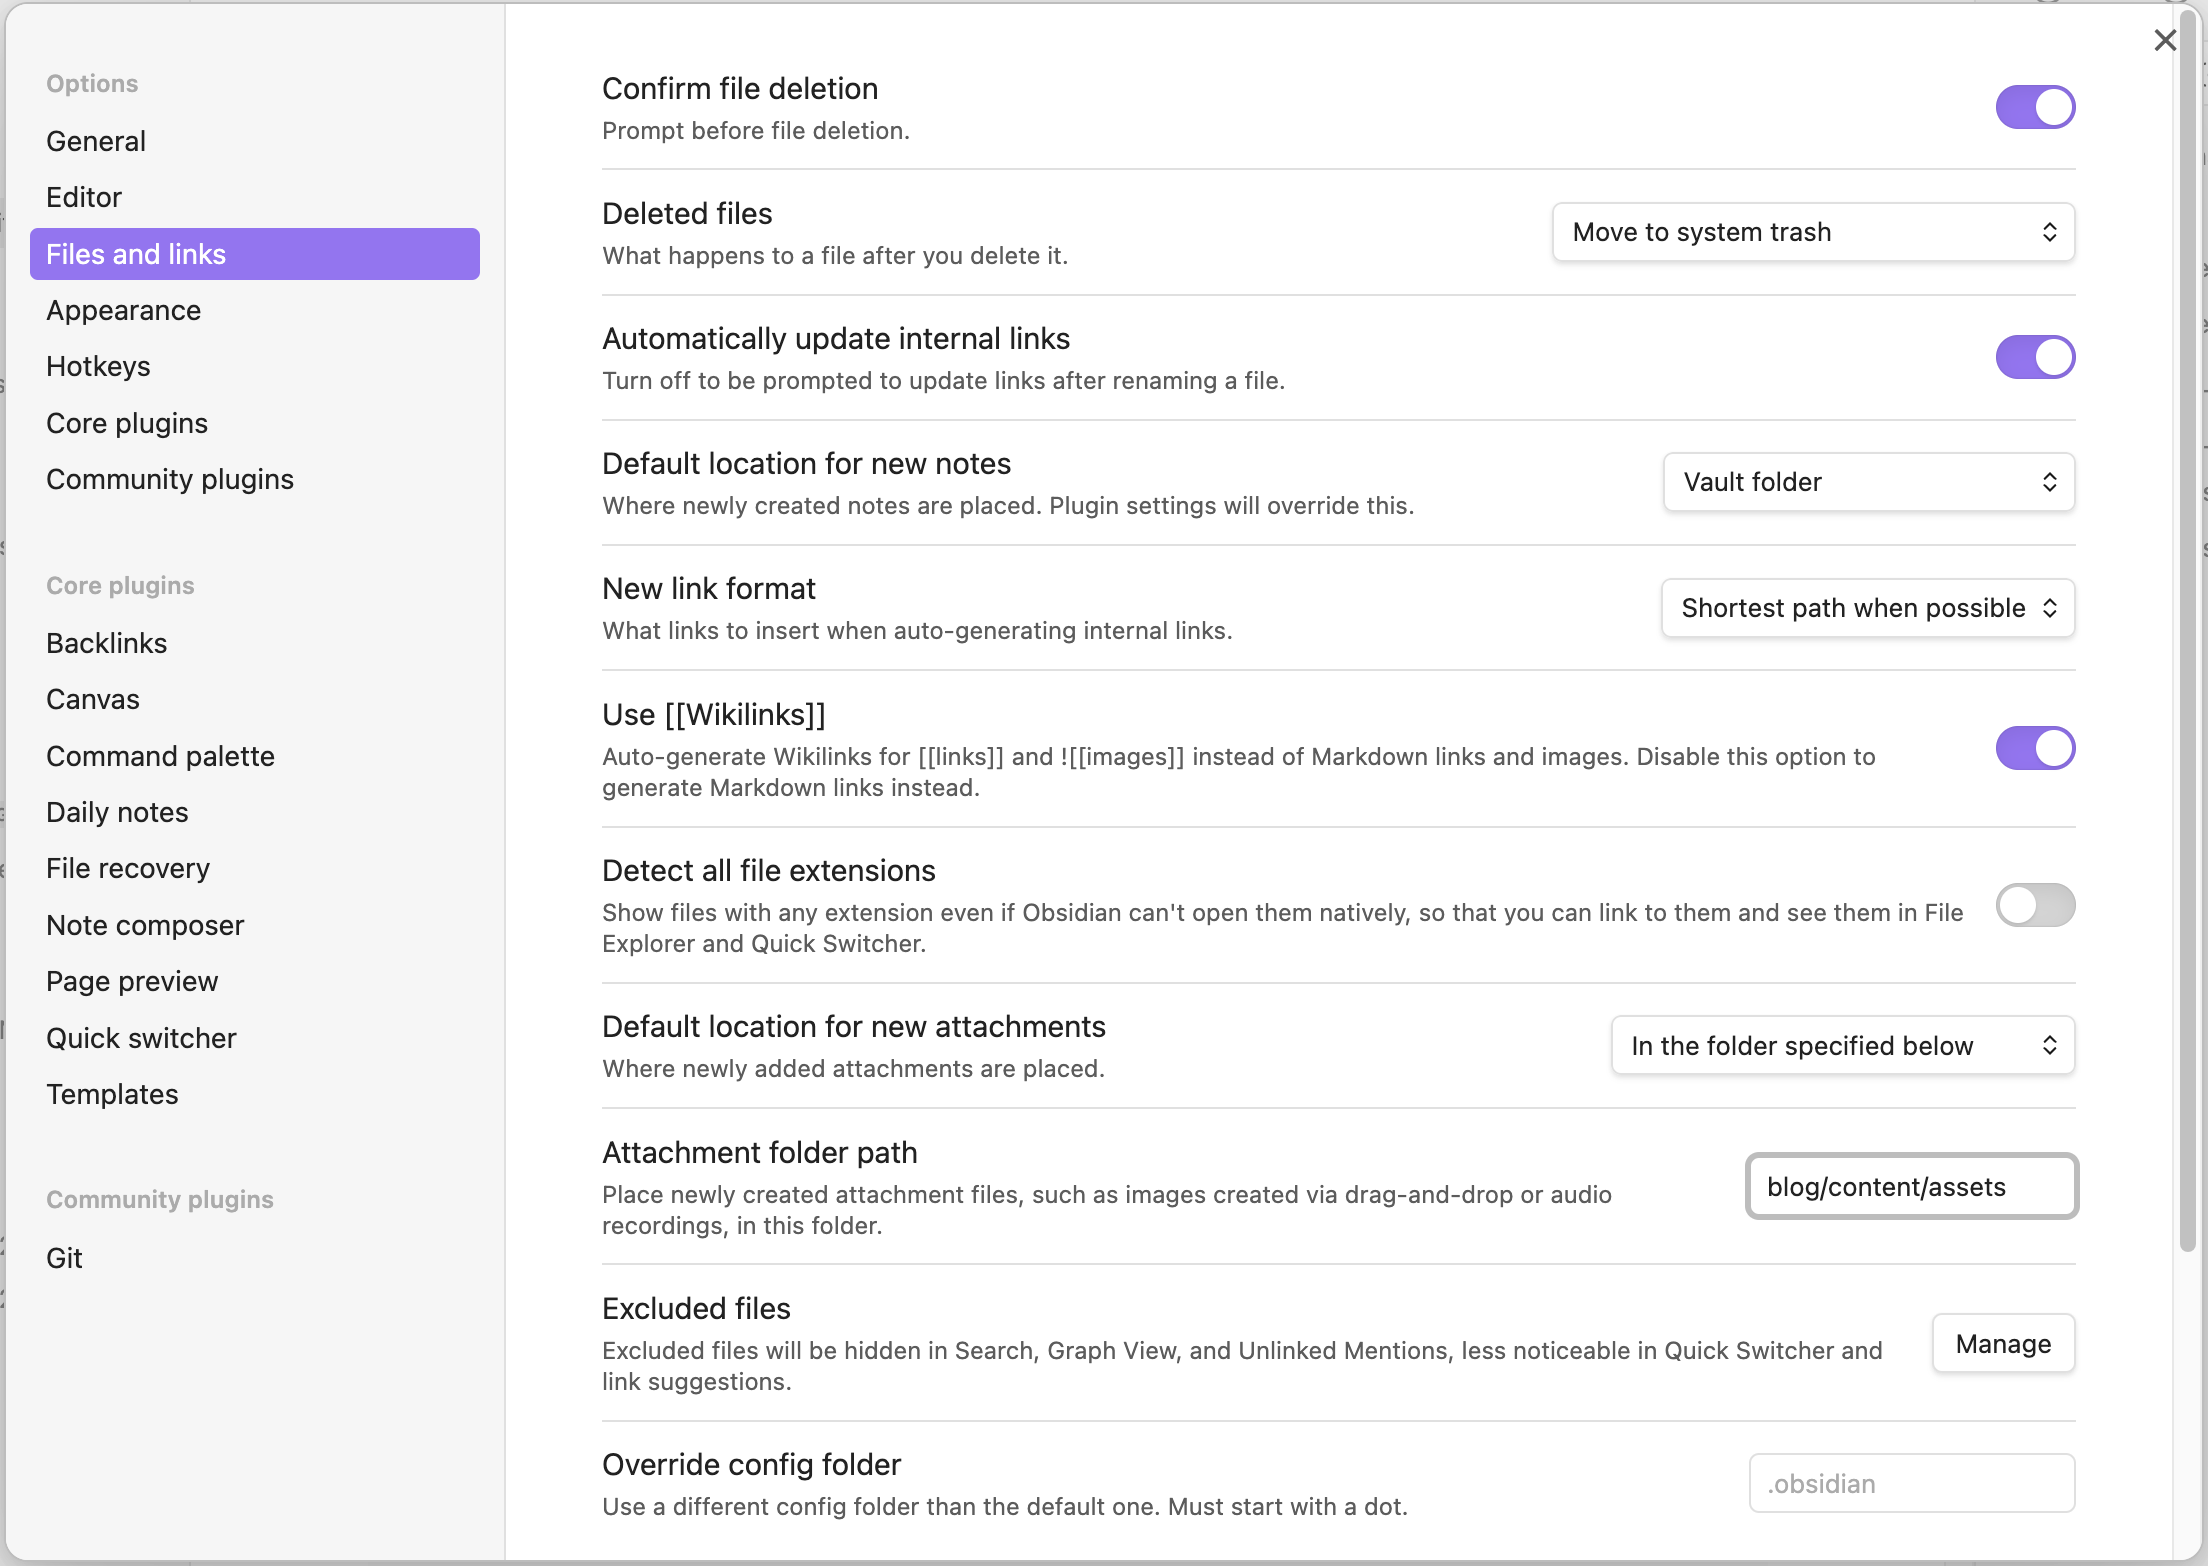
- Set the default location for images and other attachments so that when you paste an image from clipboard, it will be stored in that location
- Create the folder
assetsunderblog/content/
- Go to Settings > Files & Links > Default location for new attachments
- Select In the folder specified below and type in
blog/content/assetsas the Attachment folder path, or you can choose somewhere else
- Create the folder
3. Customize your blog
Tweak the Quartz configuration
- Right-click on
blog/and choose Show in folder (or Reveal in Finder on macOS) - Find the file
blog/quartz.config.tsand open it - Rename the title of your blog:
pageTitle: "<your blog title>", - Update the base URL:
baseUrl: "<your blog domain>", - And update other settings explained here https://quartz.jzhao.xyz/configuration as per your preference
- Save the file
- You can always go back and edit this config file later
Change the favicon and OG image
- Go to
blog/quartz/static - Replace the favicon
icon.pngand the OG imageog-image.png
Add some basic content
- Create a note named
indexinblog/content/, by default it will be the home page of your blog. Add the following content
---
title: Welcome to my blog
---

Hello world!
- To write your first blog post, create a new file in
blog/content/and start writing in Markdown. More on the workflow later (or in another post 😀). - Back up your vault to Github: Ctrl/Cmd + P > Git: Create Backup or Git: Create Backup with specific message
4. Deploy to Cloudflare Pages
The full guide is at https://quartz.jzhao.xyz/hosting#cloudflare-pages.
- Log in to the Cloudflare dashboard and select your account
- In Account Home, select Workers & Pages > Create > Pages > Connect to Git
- Select the new GitHub repository that you created and, in the Set up builds and deployments section, provide the following information:
- Production branch:
v4 - Framework preset:
None - Build command:
npx quartz build - Build output directory:
public
- Production branch:
- Press Save and deploy and wait a few minutes for your blog to be deploy to
<repo-unique-name>.pages.dev - Visit the site by going to Workers & Pages > Overview and click Visit on the blog app
After this, every time you run a backup with Obsidian Git, you will also publish the changes to your site.
Add custom domain (optional)
The full guide is at https://developers.cloudflare.com/pages/configuration/custom-domains/.
If you don’t have a domain, you can buy one from Cloudflare like I did, or choose other domain name registrars such as Namecheap and Porkbun.
5. Set up web analytics (optional)
Cloudflare also offers lightweight web analytics for free. If you choose to go with it, learn how to start at https://developers.cloudflare.com/web-analytics/get-started/.
6. Add comment section (optional)
This is an out-of-the-box feature provided by Quartz https://quartz.jzhao.xyz/features/comments. At the time of writing, the only supported provider is Giscus.
Tips
- You can use the Paste Image Rename plugin to make it easier to manage images (or any other types of attachments) pasted directly into your posts.
- To update your blog to the latest Quartz version, simply run
npx quartz update - Do not click “Use this template” to make a copy of the repo, as you won’t be able to integrate new updates from Quartz.